
Rainscreen Siding: Air Gap & Vents
Rainscreen siding guide covering air-gap sizing by cladding, vertical furring strips vs. drainage mats, base flashing clearances, and bug-screened vents.
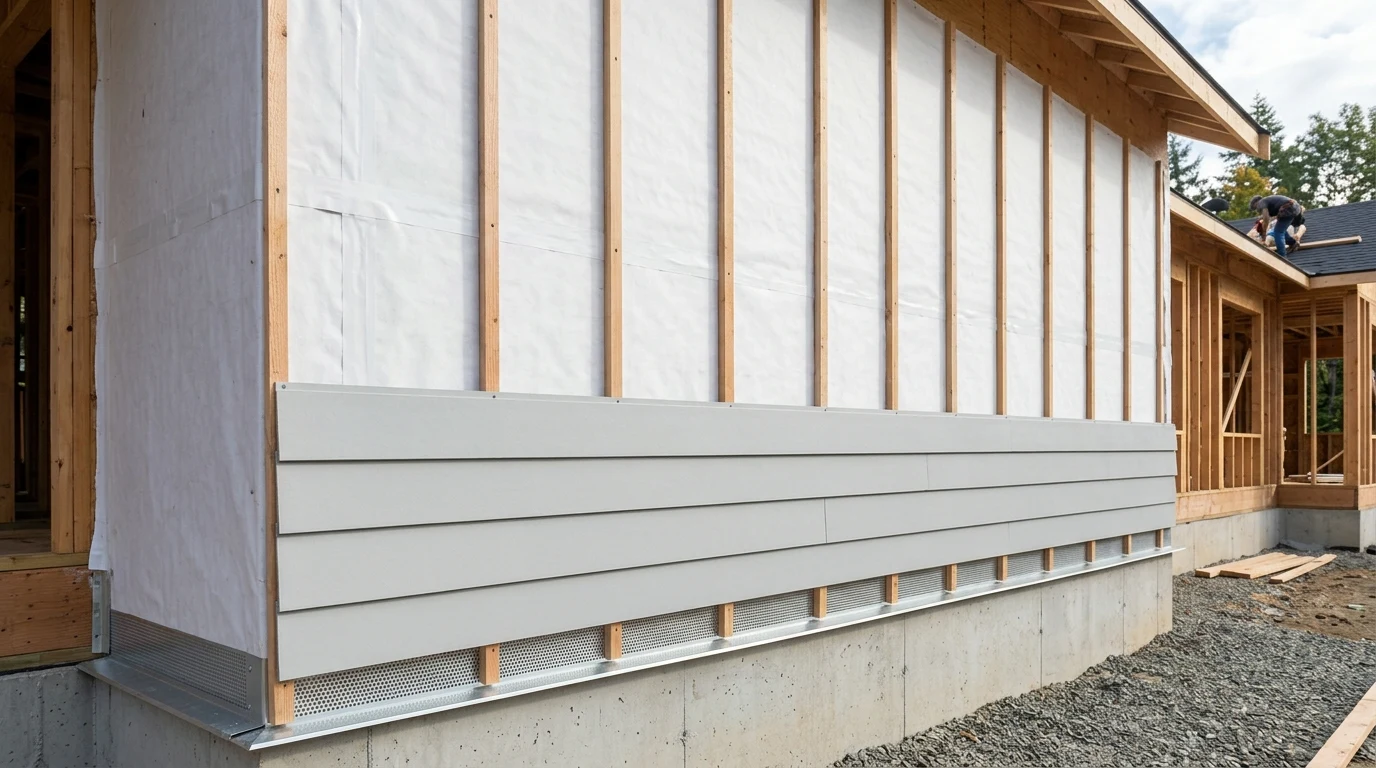
Rainscreen siding is an exterior wall system that creates a continuous drainage and airflow gap between the siding and the water-resistive barrier (WRB) so penetrating rainwater drains outward and trapped moisture evaporates. Building America recommends at least 1/16 inch behind lap siding, 3/4 inch behind stucco, and 1 inch or more behind masonry veneer, with 3/8-inch furring preferred for drying.
How Does a Rainscreen Siding Wall Assembly Work?
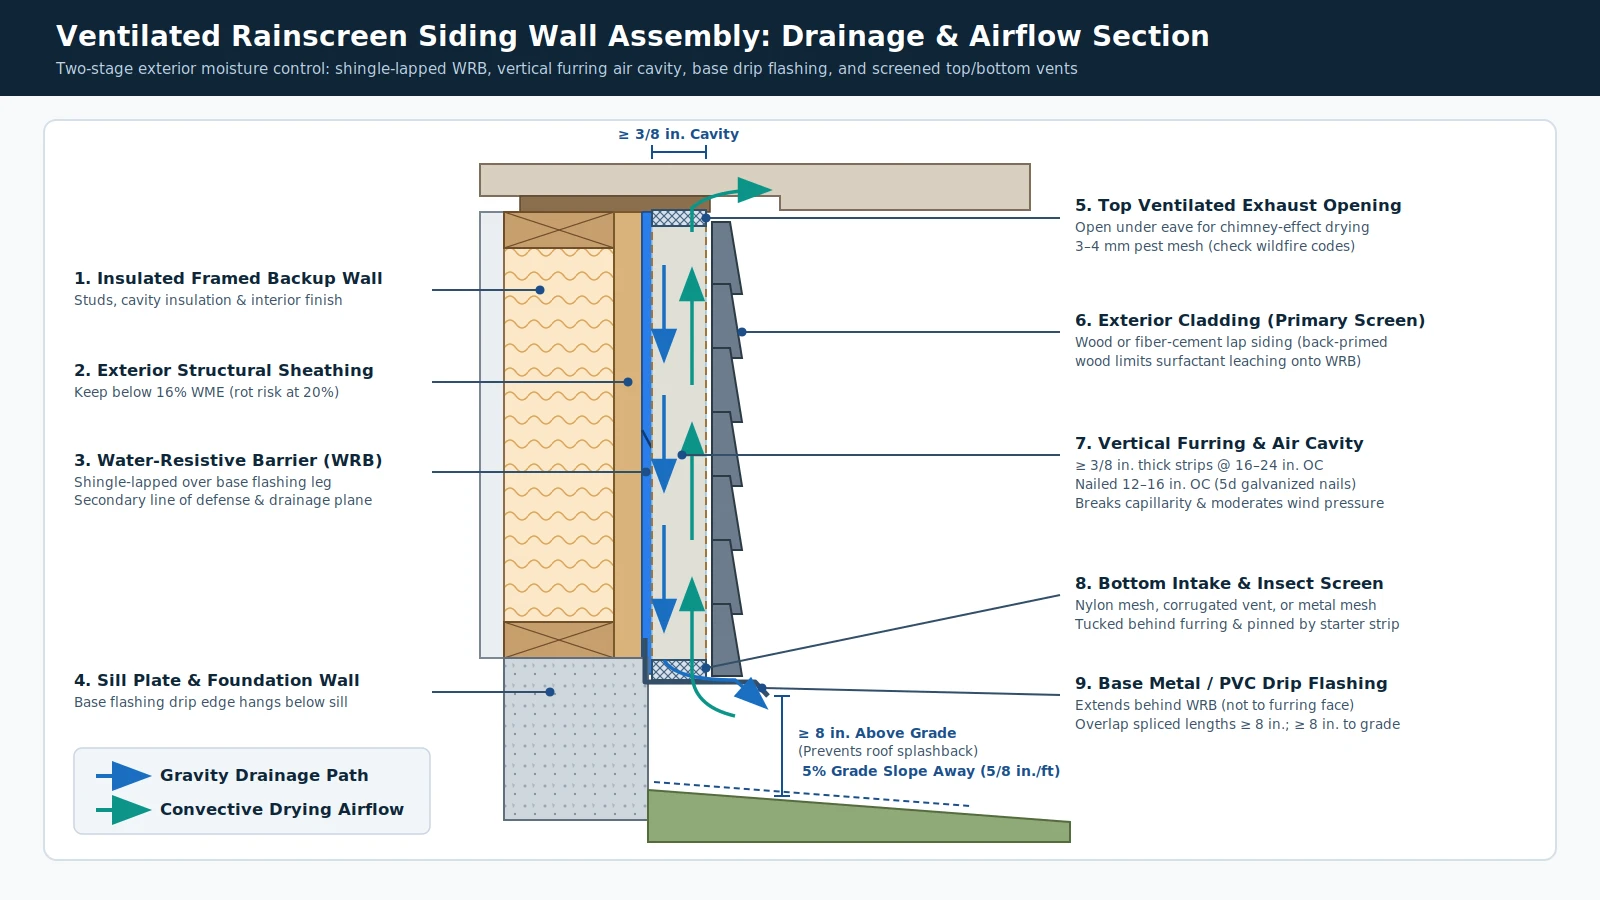
A rainscreen siding wall assembly works as a two-stage defense against water entering through cladding joints by capillary action, gravity, momentum, and wind air pressure. The outer siding sheds most bulk rain, while the air gap in front of a continuous WRB creates faster unobstructed drainage, breaks capillary wicking, moderates wind pressure differentials, and promotes drying airflow.
Most exterior wall cladding systems leak because wind pressure and capillary action drive rainwater through cracks, joints, and small gaps across residential siding. According to the DOE Building America Solution Center guide on flashing at the bottom of exterior walls, an air space between the WRB and cladding reduces moisture problems in five ways: faster unobstructed drainage, a capillary break preventing water from wicking inward, airflow that accelerates drying, pressure moderation that lowers wind-driven pressure differentials, and reduced inward vapor drive from wet cladding into the framed wall cavity.
Under 2018 IRC R703.1.1 and Section R703.2, the exterior envelope must prevent water accumulation inside the wall assembly by providing a water-resistive barrier behind the exterior cladding and a means of draining penetrating water to the exterior. Keeping the sheathing and framing dry matters because normal wood moisture equivalent (WME) stays between 8% and 13%, fungal growth begins at 16% WME, and 20% WME is enough to promote wood rot.
Reservoir Claddings, Surfactants, and Pressure Moderation
Absorptive exterior materials—including wood, fiber cement, stucco, masonry, and concrete—act as reservoir claddings that store rainwater and rely on back-side drying to protect both the siding finish and the backup wall. Behind wet brick and stone veneers, solar heating can push water vapor inward with high force; a ventilation gap dissipates that vapor before it enters the framed wall cavity.
Wood siding introduces an additional wetting mechanism when moisture leaches water-soluble surfactants out of the wood, reducing water surface tension so moisture can soak through house wrap. In DOE Building America guidance, coating wood siding boards on all sides with a clear water-repellent wood preservative, one coat of primer, and two coats of finish paint reduces surfactant leaching, while mounting boards over furring strips keeps liquid water off the WRB.
In pressure-equalized rainscreen designs documented in rainscreen building-science references, ventilation openings are sized large enough for air pressure to equalize across both faces of the cladding, with a 10:1 ratio of cladding leakage area to ventilation area suggested. For formal drainage-plane testing, ASTM E2273 covers drainage plane systems in EIFS assemblies, and ICC-ES EG356 provides an evaluation guideline for moisture drainage systems used with exterior wall veneers.
Rain-screen wall systems represent a best-practice upgrade across all exposure regions and are especially recommended in high and extreme rainfall zones, coordinating directly with the broader exterior siding and roofing water-control strategy and whole-house building envelope control layers.
What Is the Difference Between Rainscreen and Cladding?
Cladding refers strictly to the outer finish material—such as wood lap siding, fiber cement, stucco, or brick veneer—whereas a rainscreen is the complete moisture-managed wall system combining that cladding with a continuous standoff cavity, a water-resistive barrier, and integrated flashing and vent openings. A veneer installed tight against sheathing without an air space is not a rainscreen.
In exterior wall moisture-control classifications, a rainscreen cavity or drained wall stands apart from barrier walls, which rely on a single sealed exterior face to block all water entry, and mass walls, which absorb and slowly dry minor leakage. Masonry veneer qualifies as a rainscreen wall only when it stands off from the sheathing with a drained and ventilated cavity.
Building-science terminology also distinguishes narrow drainage spaces from deeper ventilation channels: a plane describes a gap of 3/8 inch (9.5 mm) or less, while a channel describes a gap greater than 3/8 inch (9.5 mm).
| Wall Moisture Strategy | Primary Water-Control Mechanism | Standoff Air Cavity | Back-Side Drying & Pressure Moderation | Typical Durability Risk |
|---|---|---|---|---|
| Barrier wall | Single sealed exterior cladding face and caulked joints | None | None | Sealants age faster than cladding and trap leakage behind finish |
| Mass wall | Absorptive masonry or concrete body that stores and releases water | None | Drying through bulk mass only | Sustained wetting in high-rainfall zones without drainage plane |
| Drained rainscreen (plane) | Cladding over continuous WRB with thin standoff space | 1/16 in. to 3/8 in. (9.5 mm) | Gravity drainage; capillary break improves at 1/4 in. to 3/8 in. | Thin gaps (1/16 in. or less) limit convective airflow |
| Ventilated rainscreen (channel) | Cladding over continuous WRB with top and bottom screened vents | Greater than 3/8 in. (9.5 mm) to 1 in. or more | Gravity drainage, full capillary break, stack-effect drying, and pressure moderation | Blocking bottom/top outlets or horizontal furring traps water |
How Much Drainage and Drying Gap Is Needed Behind Different Claddings?
DOE Building America recommends a minimum air gap of 1/16 inch behind lap siding, 3/4 inch between stucco and plastic house wrap, and 1 inch or more behind brick or stone veneer as required by the International Residential Code (2009 IRC and 2012 IRC Table R703.7.4). To break capillarity reliably and allow convective drying behind wood or fiber-cement siding, building scientist John Straube recommends at least 1/4 inch, with 3/8 inch (9.525 mm) considered safer.
Even the thinnest gaps of 1/16 inch or less—sometimes called drainscreens because wrinkled or bumpy wraps drain liquid water without providing convective airflow—perform well in dry climates or unheated structures. Independent testing by Masonry Technology Inc. demonstrates that a 3/16 inch (4.7625 mm) depth can support both drainage and airflow, while deeper gaps of 3/8 inch or wider increase safety margins in wetter, colder climates and behind higher-absorption reservoir claddings.
| Exterior Cladding Type | Minimum / Recommended Air Gap | Code or Building-Science Basis | Required Base & Cavity Detail |
|---|---|---|---|
| Wood or fiber-cement lap siding (drainscreen minimum) | 1/16 in. minimum | DOE Building America Solution Center | Wrinkled or bumpy textured drain wrap over base drip flashing |
| Wood or fiber-cement lap siding (ventilated rainscreen) | 3/8 in. (9.5 mm) minimum; half-inch plywood strips common | DOE Building America furring guidance & John Straube capillary-break threshold (1/4 in. min, 3/8 in. safer) | Vertical furring strips spaced 16 to 24 in. OC with bottom and top screened vents |
| Wood shingles or shakes | 3/16 in. (4.7625 mm) to 3/8 in. (9.525 mm) or more | Masonry Technology Inc. flow depth & Building Science Consulting capillary break | Non-compressible entangled polymer drainage mat or horizontal vented/angled battens |
| Hard-coat stucco | 3/4 in. drainage space behind stucco over plastic house wrap | DOE Building America Solution Center | Two-layer WRB bond break or drainage mat discharging onto a perforated weep screed |
| Brick or stone veneer | 1 in. or more clear air space | 2009 IRC & 2012 IRC Table R703.7.4 | Through-wall flashing, mortar mesh at base to prevent clogging, and open-weave weep holes |
| Standard hollow-back vinyl siding | Inherent contoured cavity (no added furring required) | Open-back profile & loose panel laps | Continuous shingled WRB and base flashing behind siding |
How Do You Install Rainscreen Siding Over House Wrap?
Install a rainscreen siding assembly from the bottom of the wall upward so every water-shedding layer overlaps the component below. Start with metal or PVC base flashing set at least 8 inches above a 5% sloped grade, lap the first WRB course over the vertical flashing leg, and fasten vertical furring strips at least 3/8 inch thick over the WRB at 16 to 24 inches on center before hanging siding.
Follow this field sequence to keep the drainage plane continuous across the bottom of the wall and around openings:
- Set base flashing and grade clearance: Fasten metal or PVC base flashing with a drip edge extending below the sill plate so its bottom edge sits at least 8 inches above exterior grade to prevent roofline splashback. When multiple lengths span a wall, overlap spliced pieces at least 8 inches. Slope finish grade away from all sides of the building at 5% (a 5-inch drop per 100 feet, or about 5/8-inch per foot).
- Shingle-lap the WRB over flashing: Install house wrap or building paper from bottom to top so the first course overlaps the vertical leg of the base flashing and each upper course overlaps the course below. In most assemblies, head and transition flashings extend behind the WRB rather than terminating at the outer face of the rainscreen furring strips. For detailed course overlaps, cap-nail rules, and penetration collars, coordinate with our house wrap installation guide and window sill-pan flashing guide.
- Install vertical furring strips or a drainage mat: Fasten vertical furring strips directly over stud lines spaced 16 to 24 inches on center, maintaining a clear drainage path to the bottom flashing outlet.
- Wrap bottom and top insect screening: Shield cavity intake and exhaust openings with open-mesh insect screening or dedicated corrugated vent profiles before fastening the starter course and exterior siding.
Furring Strip Materials, Orientation, and Fastening
Under DOE Building America construction guidance for wood or fiber-cement lap siding, vertical furring strips need to be at least 3/8 inch thick, spaced every 16 to 24 inches on center, and nailed every 12 to 16 inches with 5d galvanized nails. Builders frequently rip half-inch CDX plywood into vertical strips over solid wood sheathing in cold climates such as zones 5A and 6A because plywood stays dimensionally stable, whereas OSB swells excessively when exposed to incidental moisture.
When siding mounts over continuous exterior rigid foam insulation, plywood strips and standard thin commercial rainscreen battens lack adequate stiffness to carry cladding loads; building-science consultant Michael Maines specifies 1x3 wood strapping fastened through the foam into studs so the strapping doubles as both structural cladding support and the rainscreen air cavity. On a rigid-foam wall, DOE Building America also documents 3/8-inch furring strips providing a continuous drainage plane between the foam and fiber-cement lap siding.
Match furring orientation carefully to the siding profile so horizontal battens never dam vertical drainage:
- Horizontal lap siding: Install vertical furring strips along stud lines so water drains straight down and warm air rises unobstructed.
- Vertical board siding or shingle siding: Use horizontal rainscreen battens engineered with built-in drainage channels, such as polypropylene Cor-A-Vent Sturdi-Batten, aluminum Roll-On Rainscreen, or steel FM3-VHV, or install wood furring strips on an angle so nails hit solid backing while water and air still travel downward and upward.
When Should You Choose a Drainage Mat vs. Furring Strips?
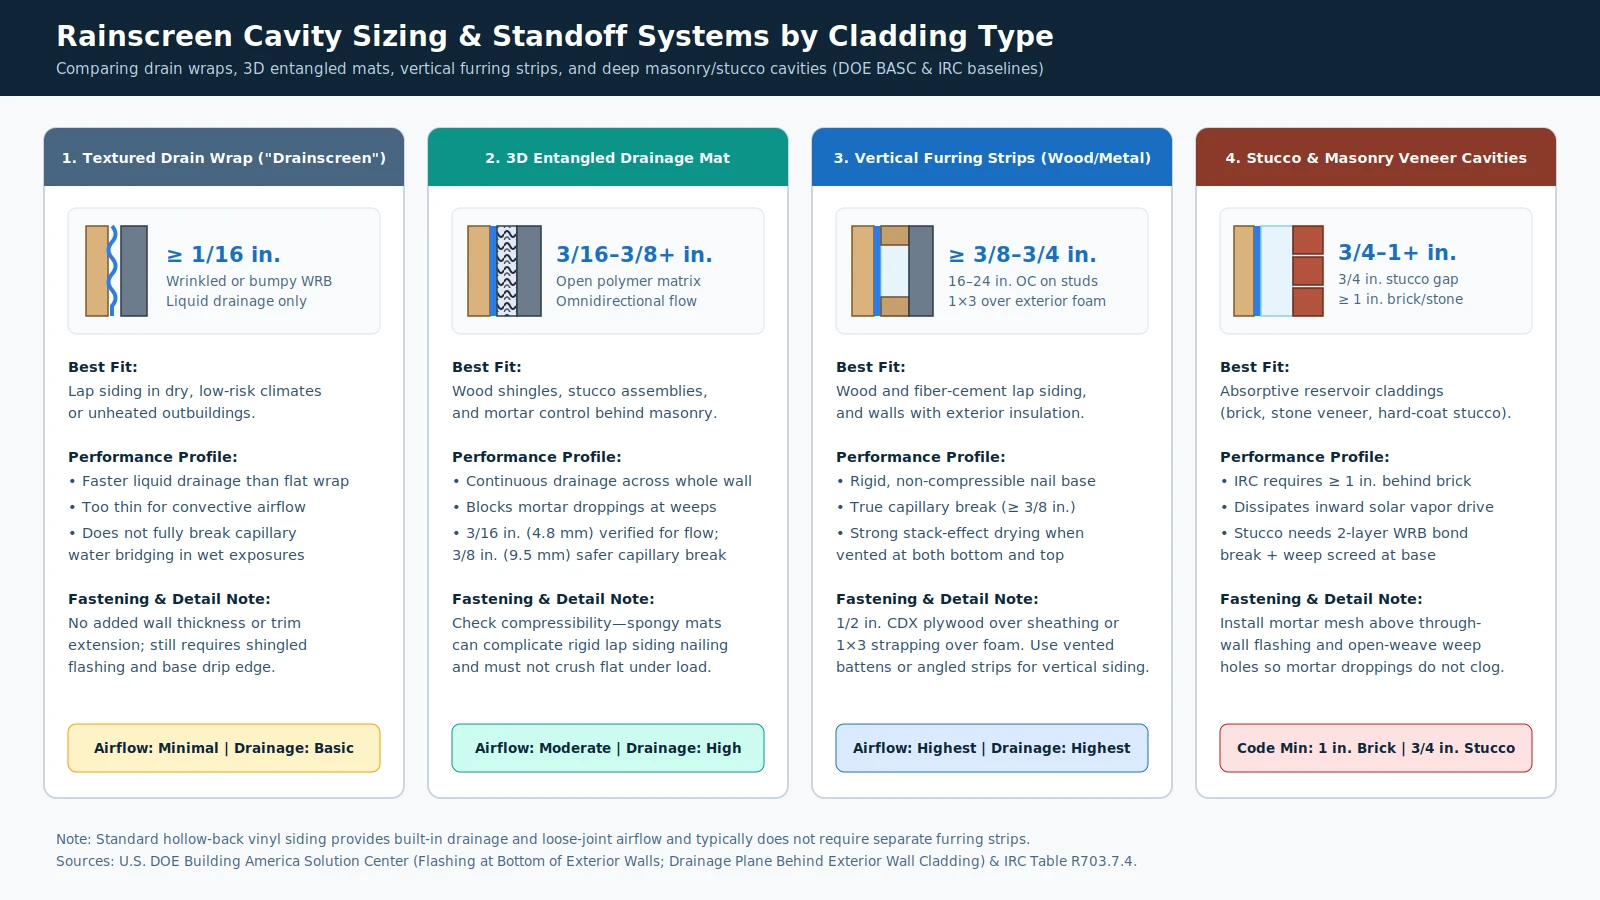
Choose rigid vertical furring strips for horizontal wood or fiber-cement lap siding and any wall with continuous exterior foam insulation because strips provide a solid, non-compressible nailing base and maximum stack-effect airflow. Choose an entangled polymer drainage mat behind wood shingles, stucco, or brick and stone veneer where continuous wall-wide drainage and mortar-clog prevention outweigh rigid strip nailing.
Entangled plastic mesh mats such as Benjamin Obdyke Slicker Classic work well under wood shingles, while thicker mats such as Slicker Max and Advanced Building Products Mortairvent prevent mortar droppings from blocking the required air space behind brick veneer. Because polymer mesh mats can compress under fastener pressure, they can make installing rigid lap siding tricky; rainscreen technical guidance emphasizes verifying that the chosen drainage mat does not crush flat during installation so the intended air gap remains open.
Textured drain wraps—either wrinkled wraps like DuPont Tyvek DrainWrap or bumpy wraps with plastic spacers like Benjamin Obdyke HydroGap—provide a 1/16-inch drainage space that sheds bulk water faster than smooth house wrap without thickening window trim jambs, making them practical in dry climates or low-risk unheated buildings where full convective drying is less critical.
| Rainscreen Standoff Option | Typical Air Gap Depth | Compressibility & Fastening | Airflow & Drying Capacity | Best Cladding & Exposure Fit |
|---|---|---|---|---|
| Textured drain wrap (wrinkled or bumpy WRB) | 1/16 in. minimum | Non-structural thin profile; standard siding fasteners | Liquid drainage only; minimal airflow | Lap siding in dry, low-risk climates or unheated buildings |
| Entangled polymer drainage mat | 3/16 in. (4.7625 mm) to 3/8 in. (9.525 mm) or thicker | Compressible matrix; verify non-crushing under fasteners | Omnidirectional drainage with moderate airflow | Wood shingles, stucco over WRB, and mortar control behind brick/stone veneer |
| Vertical wood or plywood furring strips | 3/8 in. minimum; half-inch CDX or 1x3 strapping common | Rigid, non-compressible nail base; 1x3 required over exterior foam | Highest drainage and stack-effect ventilation | Wood and fiber-cement lap siding; high-rainfall and cold climates |
| Vented plastic or metal horizontal battens | Engineered slotted drain channels | Rigid polypropylene, aluminum, or steel channels | Drained and ventilated across horizontal support runs | Vertical board-and-batten siding or wood shingles needing horizontal nailing |
How Do Top and Bottom Rainscreen Siding Vents Stay Bug-Free?
Ventilated rainscreens keep both bottom intake and top exhaust openings open to drive upward airflow, whereas vented rainscreens open only at the bottom for slower drying. Keep pests out without choking airflow by screening both terminations with 3 to 4 mm open mesh—using nylon screening wrapped behind furring strips, corrosion-resistant metal mesh where rodents are a concern, corrugated plastic vent strips, or perforated metal J-bead.
In DOE Building America wall-base details, installers tuck open-mesh nylon screening behind the bottom of the vertical furring strips, wrap the mesh around the bottom strip ends, and pin it securely with the siding starter strip. DOE Building America cautions against ordinary steel metal screening that can rust, while building-science guidance notes that corrosion-resistant metal window screen or perforated metal J-bead can deter rodents and bats alongside insects, and corrugated plastic vent products such as Cor-A-Vent keep both top and bottom cavity edges open.
Aperture sizing directly governs long-term vent performance. Recommended insect-mesh openings are 3 to 4 millimeters: openings larger than 4 mm lose pest-blocking effectiveness rapidly, while openings smaller than 3 mm clog quickly with dust, paint, or debris.
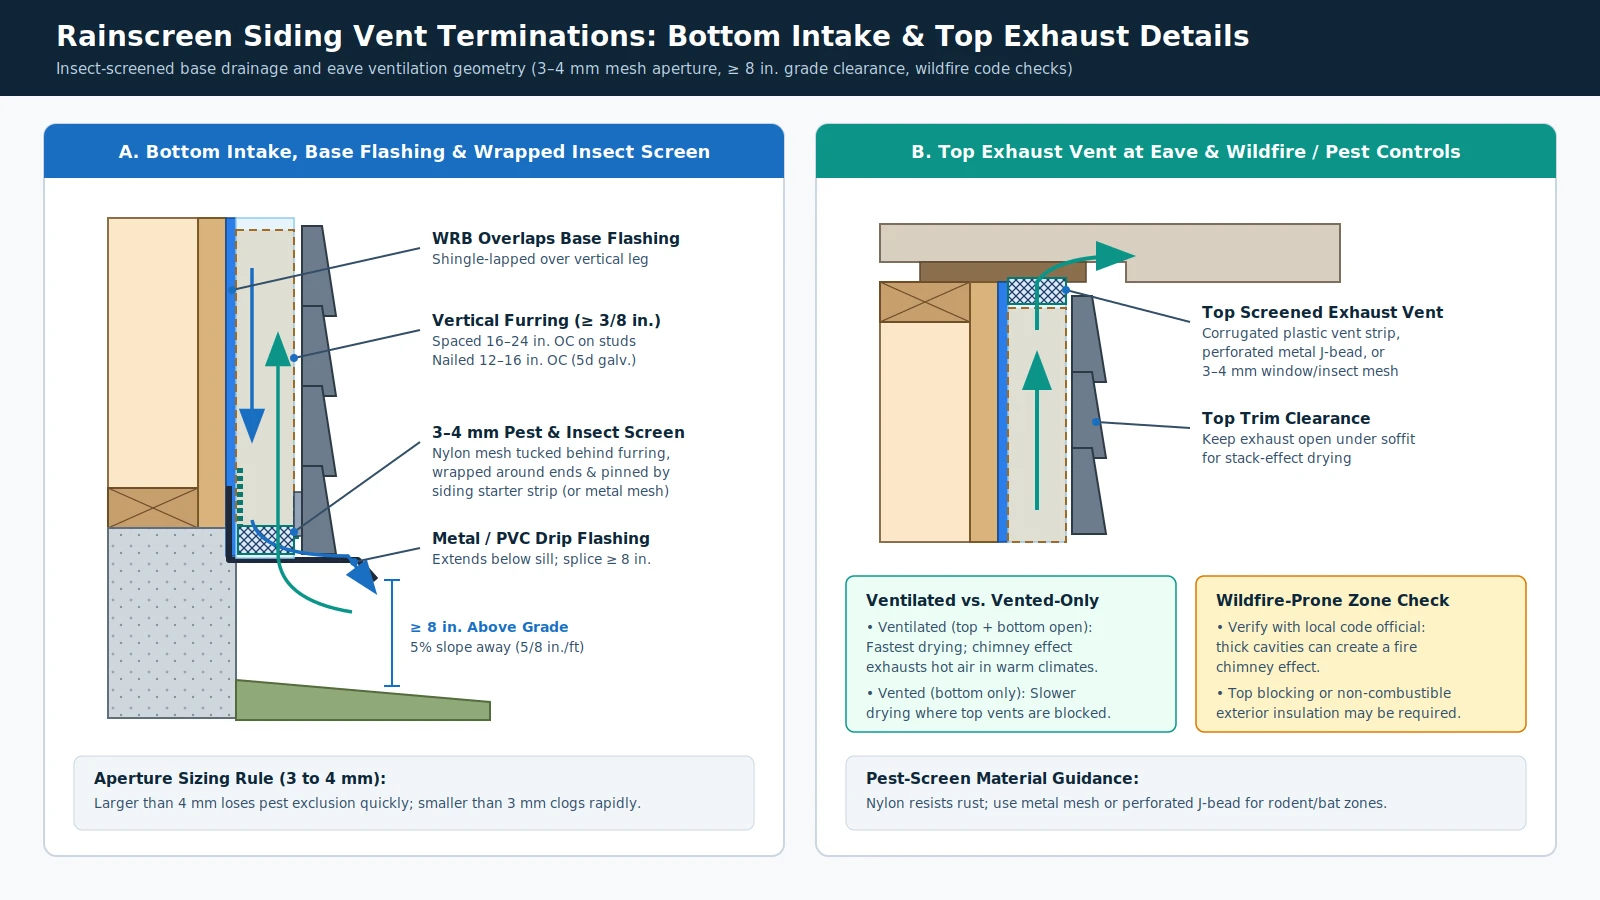
In wildfire-prone regions, always verify rainscreen vent details with the local code official before framing the cavity. Deeper ventilated air spaces can create a chimney effect that accelerates external fire spread, and local wildfire codes may limit cavity thickness, restrict combustible exterior insulation, or require blocking the top of the rainscreen gap.
Pre-Cladding Rainscreen Inspection Checklist
- Confirm base flashing sits at least 8 inches above a 5% sloped finish grade, overlaps spliced joints by at least 8 inches, and kicks drainage outward below the sill plate.
- Verify the WRB overlaps the vertical leg of the base flashing and all window, door, and roof-wall flashings in bottom-to-top shingle order before furring goes up.
- Confirm cavity depth matches cladding exposure: at least 3/8 inch behind wood or fiber-cement lap siding, 3/4 inch behind stucco, and 1 inch or more behind brick or stone veneer.
- Check vertical furring alignment on 16- to 24-inch stud centers with 12- to 16-inch galvanized nail spacing, or confirm vented/angled battens for vertical siding so no horizontal strip blocks drainage.
- Inspect bottom intake and top exhaust openings to verify continuous 3 to 4 mm pest screening and confirm local wildfire code compliance where top cavity venting is restricted.
Is a Rainscreen Cavity Needed Behind Vinyl Siding?
Standard hollow-back vinyl siding generally does not require a separate furring-strip rainscreen cavity because its contoured profile leaves an open air space behind the panels that minimizes capillary action, and its loosely interlocked horizontal laps permit drainage and airflow. However, vinyl siding still requires a continuous, shingle-lapped WRB and properly integrated base and opening flashings behind it.
Unlike hollow-back vinyl, absorptive reservoir claddings—including painted wood lap siding, wood shingles, fiber-cement boards, hard-coat stucco, and brick or stone masonry—hold moisture directly against the wall face if installed flat over house wrap. In high and extreme rainfall zones, coastal exposures, or hot-humid assemblies subject to inward moisture drive, pairing absorptive siding with a 3/8-inch or deeper ventilated rainscreen cavity protects both paint durability and structural wood sheathing.
Frequently Asked Questions About Rainscreen Siding
Do wood rainscreen furring strips need to be pressure treated?
Wood rainscreen furring strips do not need to be pressure treated or naturally rot resistant in typical ventilated assemblies. Because the open rainscreen air gap promotes rapid evaporation, the small amount of moisture reaching the furring strips dries quickly, making half-inch CDX plywood strips or 1x3 wood strapping durable choices while avoiding OSB strips that swell when damp.
What is the difference between a vented and a ventilated rainscreen?
A vented rainscreen is open only at the bottom of the wall to drain bulk water and allow limited air exchange, while a ventilated rainscreen includes screened openings at both the bottom and top of the wall. Adding the top exhaust opening improves drying speed in damp and cold climates and allows a convective chimney effect that exhausts warm air behind sun-heated siding in hot climates.
Can horizontal furring strips be used behind vertical siding?
Solid horizontal wood furring strips installed flat over a WRB trap draining water and block upward airflow, so they should not be used behind vertical siding. Instead, install commercially slotted horizontal battens with built-in drainage gaps—such as polypropylene Sturdi-Batten or metal Roll-On Rainscreen and FM3-VHV channels—or fasten wood furring strips at an angle to support vertical boards while preserving drainage and airflow.
Why does stucco need a two-layer WRB or drainage mat behind it?
Hard-coat stucco is porous, prone to cracking, and bonds tightly to wet building paper or house wrap, which allows absorbed water to wick across a single barrier layer. Building codes typically require two layers of building paper (or a bond-breaking layer over a textured drain wrap or drainage mat) above a perforated weep screed so water penetrating the stucco separates and drains down between the two layers.
How can mortar droppings be kept from clogging a brick rainscreen cavity?
Brick and stone veneers require at least a 1-inch air gap under the IRC, and mortar squeezed out during laying can bridge the cavity and clog bottom weep holes. Installing a mortar mesh or thicker entangled drainage mat at the base of the cavity above flexible through-wall flashing catches droppings while open-weave mesh in head-joint weep holes keeps mud wasps and debris from blocking drainage.
Primary Sources & Code References
- Flashing at Bottom of Exterior Walls U.S. Department of Energy / PNNL Building America Solution Center · reviewed November 22, 2026
- Drainage Plane Behind Exterior Wall Cladding U.S. Department of Energy / PNNL Building America Solution Center · reviewed November 22, 2026
- Rainscreen Wikipedia · reviewed November 22, 2026
Related Engineering Guides
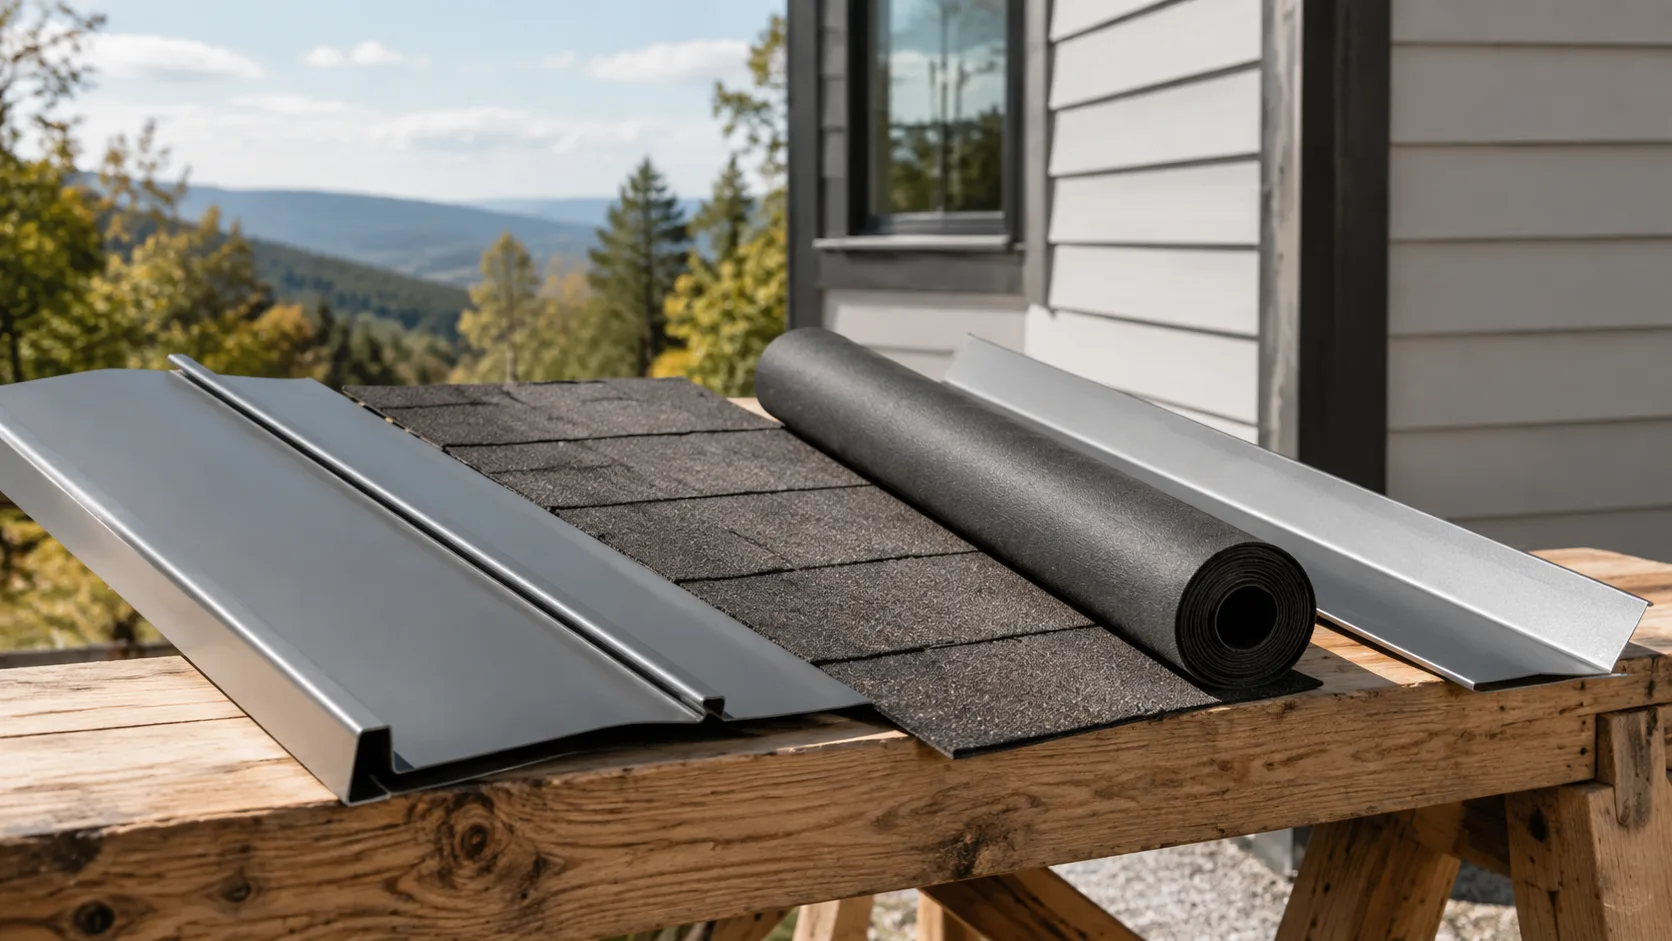
Exterior Siding and Roofing: Drainage, Cladding and Roof Details
Compare fiber-cement, metal and vinyl siding, roof coverings and the flashing connections that keep rain, air and moisture control continuous.
Read technical guide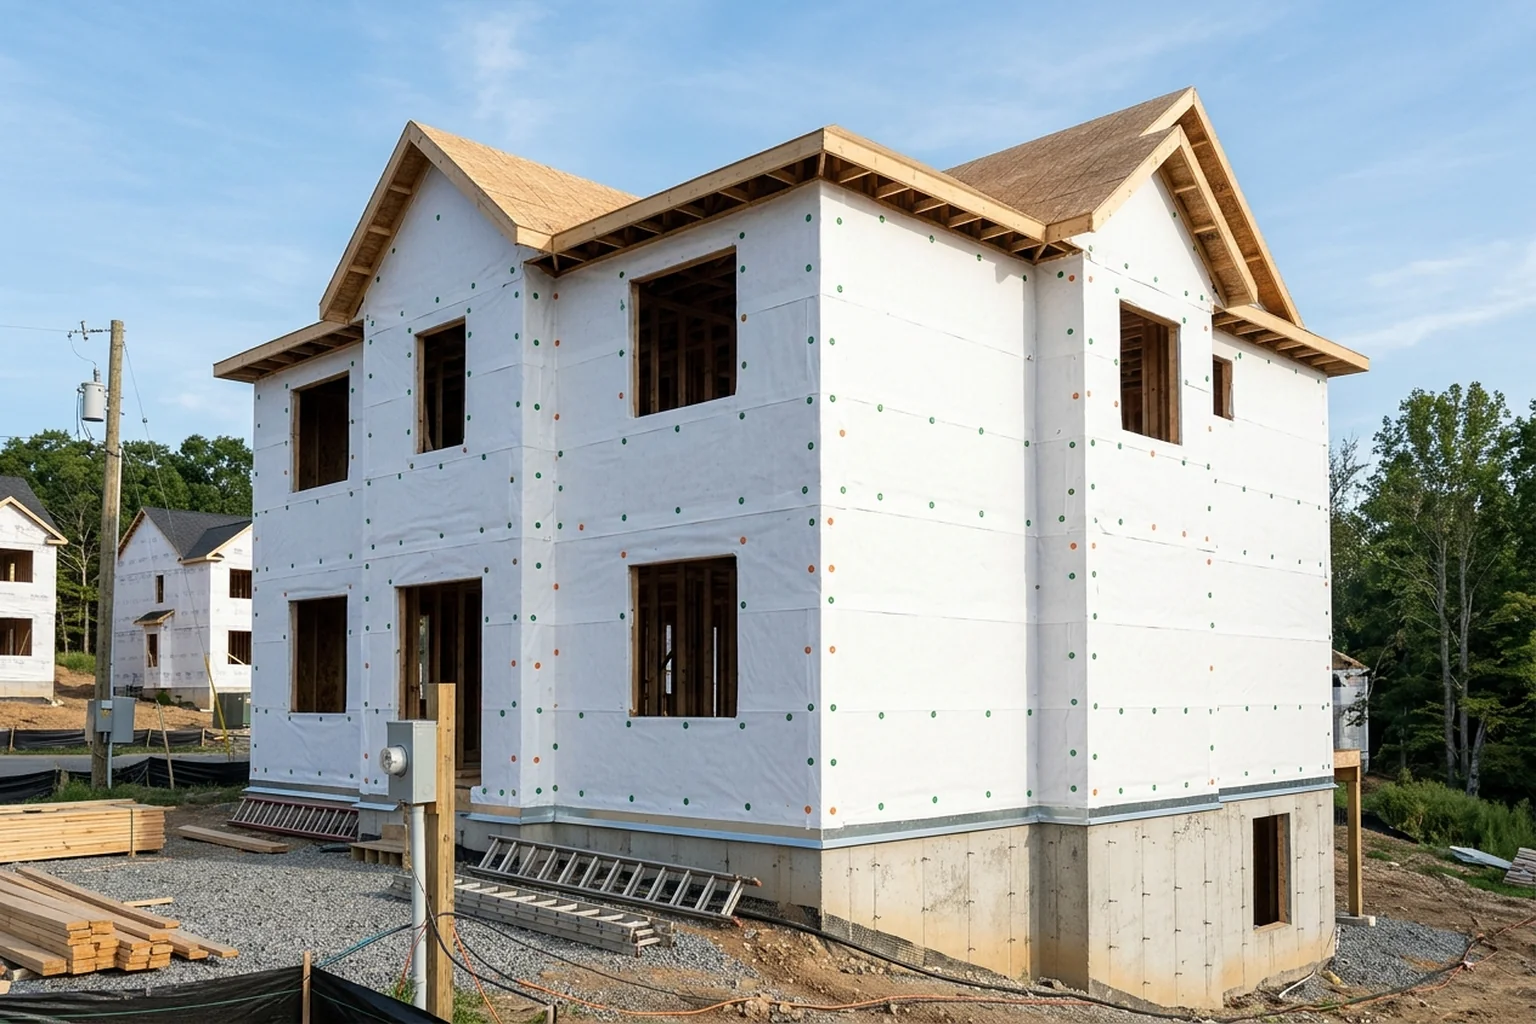
House Wrap Installation & Laps
Field guide to house wrap installation: shingle-lapped courses, horizontal and vertical seam overlaps, cap-nail spacing, tape sealing, and pipe penetrations.
Read technical guide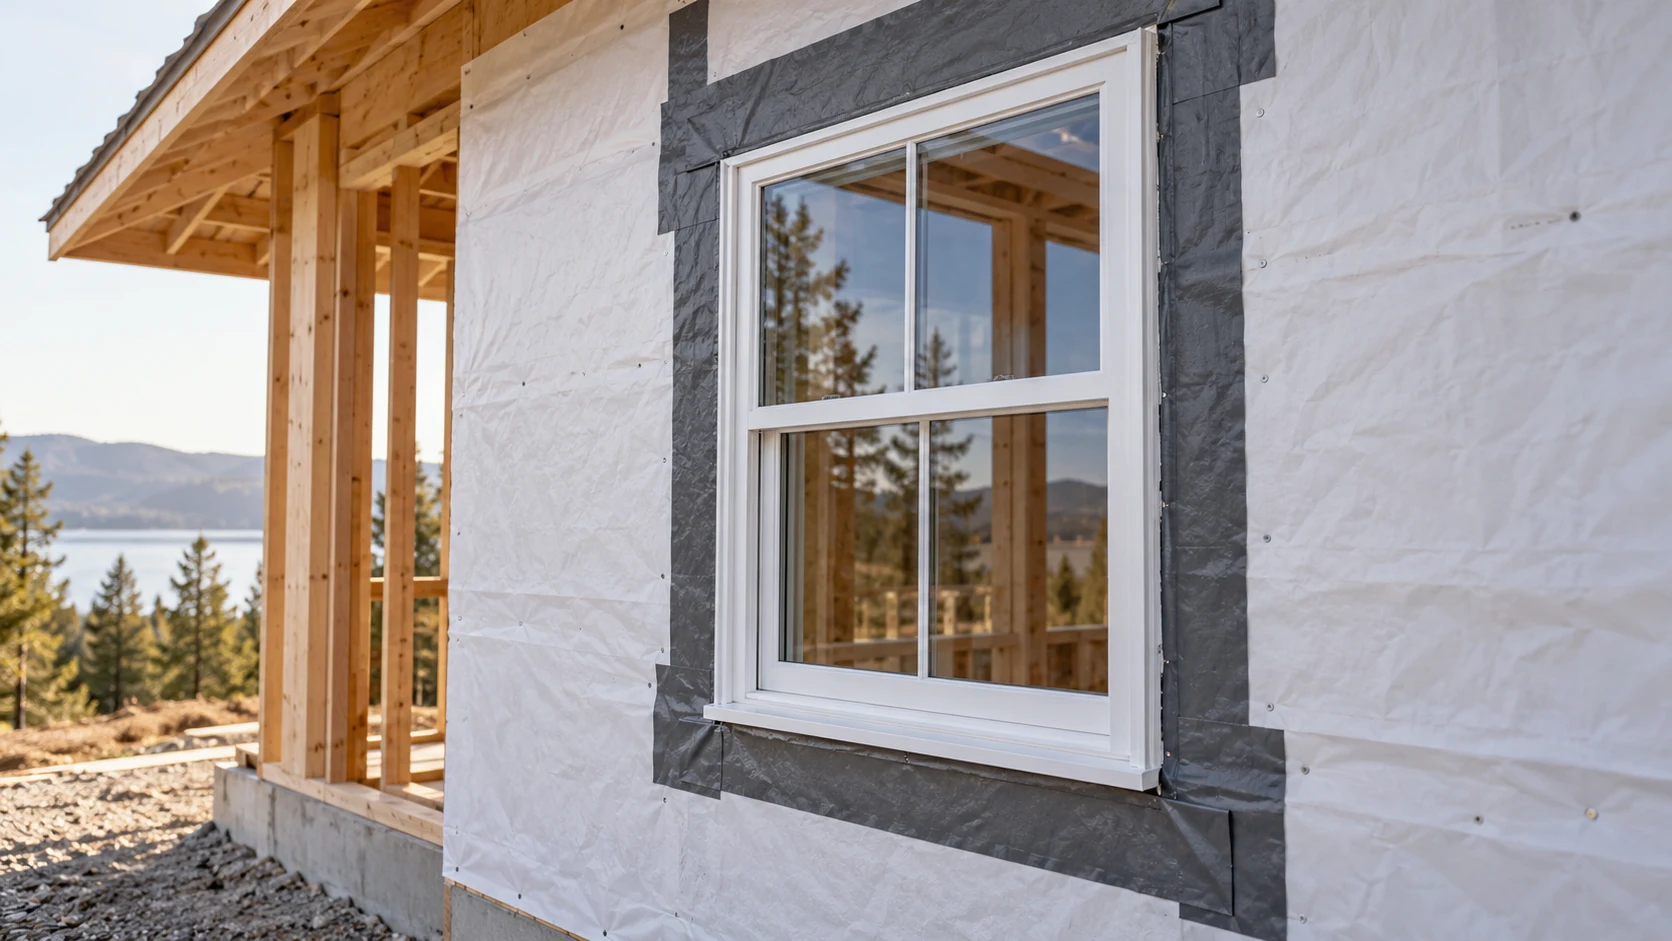
Window Flashing Installation: Sill Pan and Wrap Laps
Properly lapped flashing directs water out of the wall cavity.
Read technical guide