
Window Flashing Installation: Sill Pan and Wrap Laps
Properly lapped flashing directs water out of the wall cavity.

For window flashing installation in the illustrated sequence, install the sill pan before setting the window.
Use this guide for a drained, flanged-window opening with house wrap. Work through the sill, jamb, head, and upper-wrap junctions alongside the selected assembly details. For the broader exterior topic, continue to exterior siding and roofing. In hot-humid markets, pair that sequence with moisture control for coastal climates.
Follow the lap order from the sill upward
Properly lapped flashing directs water out of the wall cavity.
Flashing must be integrated with the wall drainage plane.
Read the following checkpoints from the lower edge of the opening toward the head. Keep the matching window and house-wrap instructions beside the opening while reviewing each junction.
- The pan flashing laps over the drainage plane below the opening.
- Side flashing extends over the pan flashing.
- Head flashing extends over the side flashing.
- Fold the house wrap down over the head flashing.
In the illustrated house-wrap preparation sequence, the side and bottom house-wrap flaps fold into the opening.
The head flap is temporarily folded up to expose the sheathing.
For the wider wall assembly discussion, see building envelope. Here, keep the review focused on the opening and the connections immediately around it.
Form the window sill pan flashing
A sill pan collects water leaking through or around the opening and directs it outside.
PNNL lists rigid, flexible, or fluid-applied pan flashing at sills.
Install the drainage plane below the window before the pan to prevent a reverse lap.
The pan surface should form a continuous waterproof barrier without water-retaining holes, tears, or wrinkles.
A back dam or positive slope directs pan water outside.
End dams prevent water from moving sideways into the wall.
Review the pan as a complete assembly: the surface beneath the window, the back edge, the ends, and the front lap. Use those locations as the order for the close inspection.
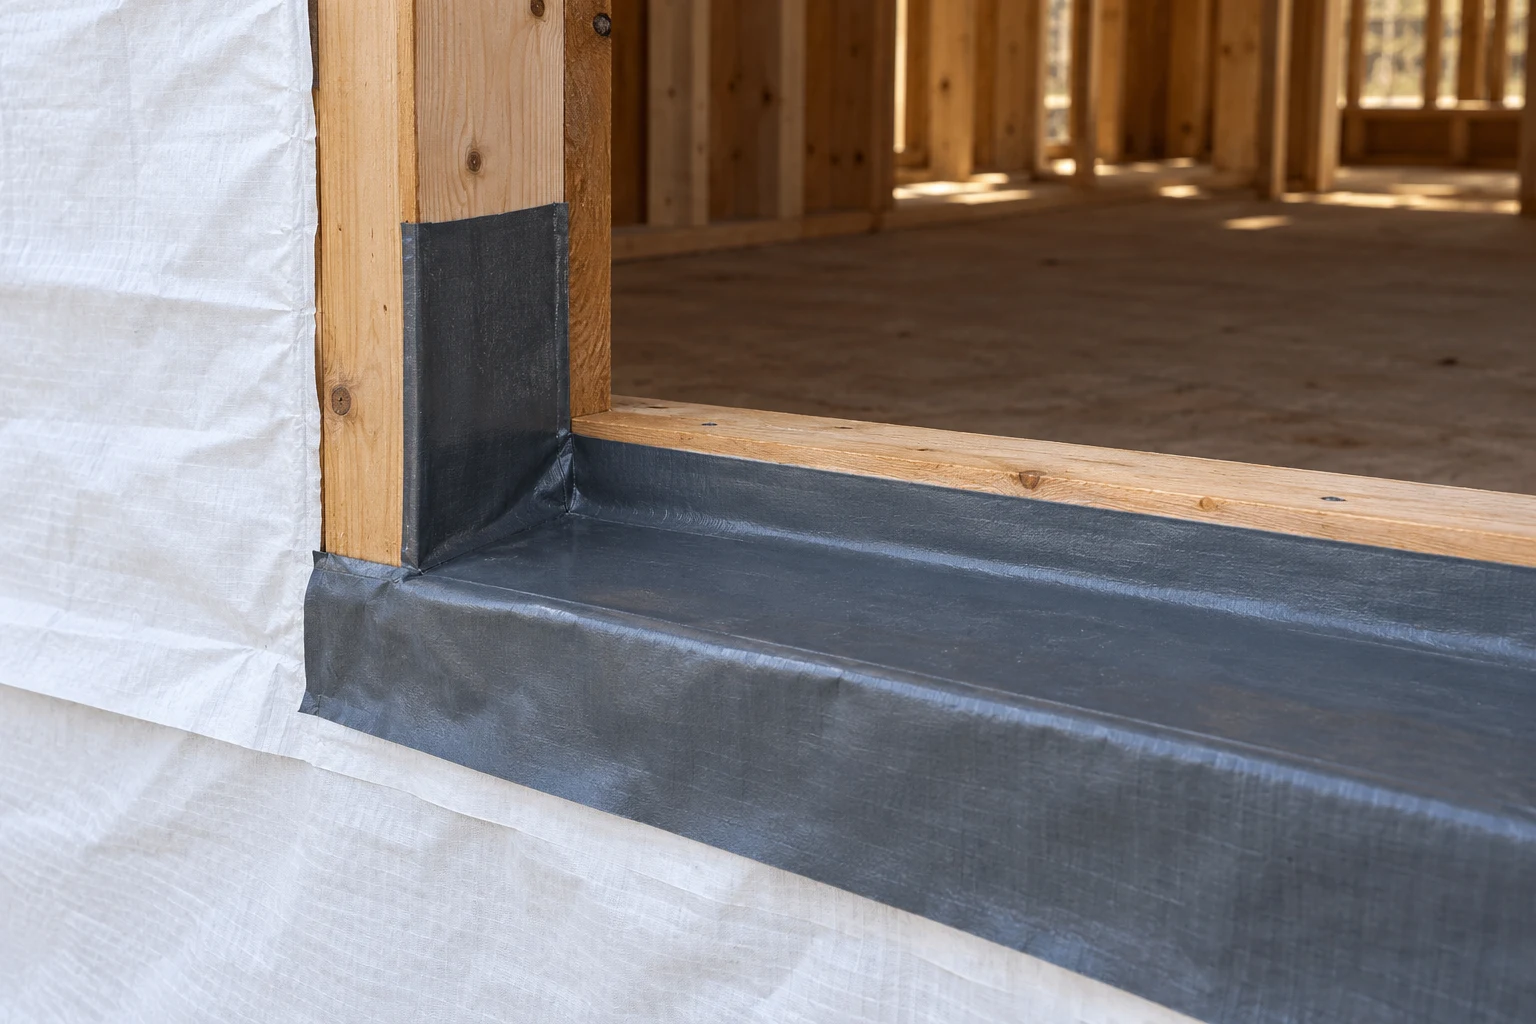
Formable self-adhered membrane can cover the sill bottom and sides continuously by bending at the corners.
The membrane should fit tightly into the sill-to-jamb corner rather than bridge it.
A membrane that bridges the corner can be torn by the window unit.
Press the sill membrane tightly into corners to avoid tears during window installation.
A pan made in two pieces needs its joint sealed.
Protect manufactured and sheet-metal pan back dams from bending or breaking during window installation.
Before moving on, ask: Is the corner tightly fitted? Where is the back dam or outward slope? Where are the end dams? Where does the front apron meet the wrap below? Keep these questions tied to the pan detail selected for the opening.
Set the window, then complete the jamb and head laps
Install the sill pan before setting the window.
Install the window plumb, level, and square to its manufacturer’s specifications.
In this exterior flashing sequence, do not caulk across the sill.
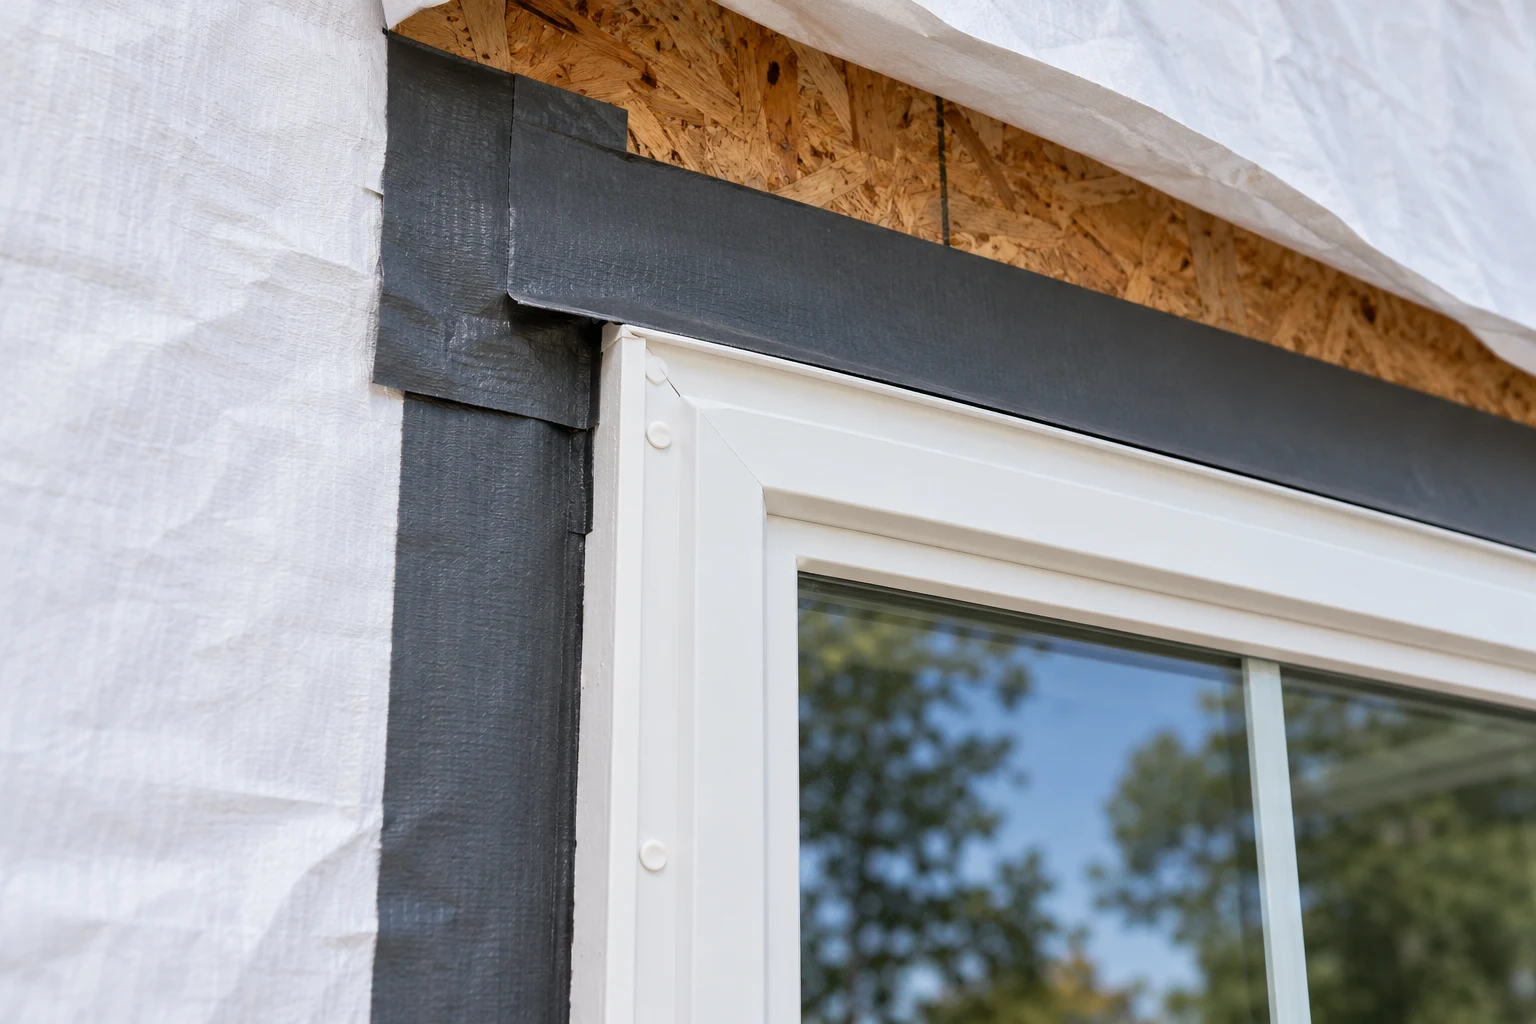
In the illustrated flashing sequence, install the side flashing so it extends over the pan flashing at the bottom of the opening.
PNNL’s illustrated jamb flashing finishes even with the bottom of the sill flashing.
PNNL’s illustrated jamb flashing extends 4 inches above the head flange.
After the side flashing, install the head flashing so it extends over the side flashing.
PNNL’s illustrated head flashing extends 1 inch beyond the jamb flashing.
Keep the dimensions in this illustrated detail together when reviewing its jamb and head junctions. Compare the selected assembly drawing at the same locations: jamb top, jamb bottom, and head-flashing ends.
Bring the house wrap over the head flashing
Fold the house wrap down over the head flashing.
Pay particular attention to the instruction for the lower edge of the head flap. Read that instruction in the detail for the wrap system being used.
PNNL’s illustrated detail tapes the bottom edge of the head flap and its corner seams.
TYPAR’s typical window detail says not to tape the WRB along the top of the window flange.
Use the named system’s head-flap detail when deciding how to finish that edge. Keep the flap-edge decision beside the drawing rather than treating it as a separate finishing preference.
Prepare window flashing tape for the selected system
TYPAR flashing should be installed on a dry surface free of dirt and debris.
TYPAR’s jamb flashing instructions require no wrinkles or bubbles.
DuPont self-adhered flashing should be installed on clean, dry, frost-free surfaces.
DuPont self-adhered flashing performs best when installed above 25°F (–4°C).
Do not stretch FlexWrap™ along sills or jambs.
FlexWrap™ is intended to be stretched only at corners or curved sections.
Check the product name on the flashing instructions before applying the preparation or stretching directions. For FlexWrap™, review the straight sill and jamb runs separately from the corners and curved sections.
At this point, pause over the actual tape work: examine the surface preparation, the corner fit, and the finished jamb strips. Use the product-specific directions above as the review questions, and keep the applicable installation guide open at that detail.
Keep exterior drainage and interior air sealing distinct
The exterior bottom edge of the drained opening must remain open for drainage.
The entire interior window perimeter should be air sealed with sealant or non-expanding foam.
Keep the window’s weep holes open so moisture behind the glass can escape.
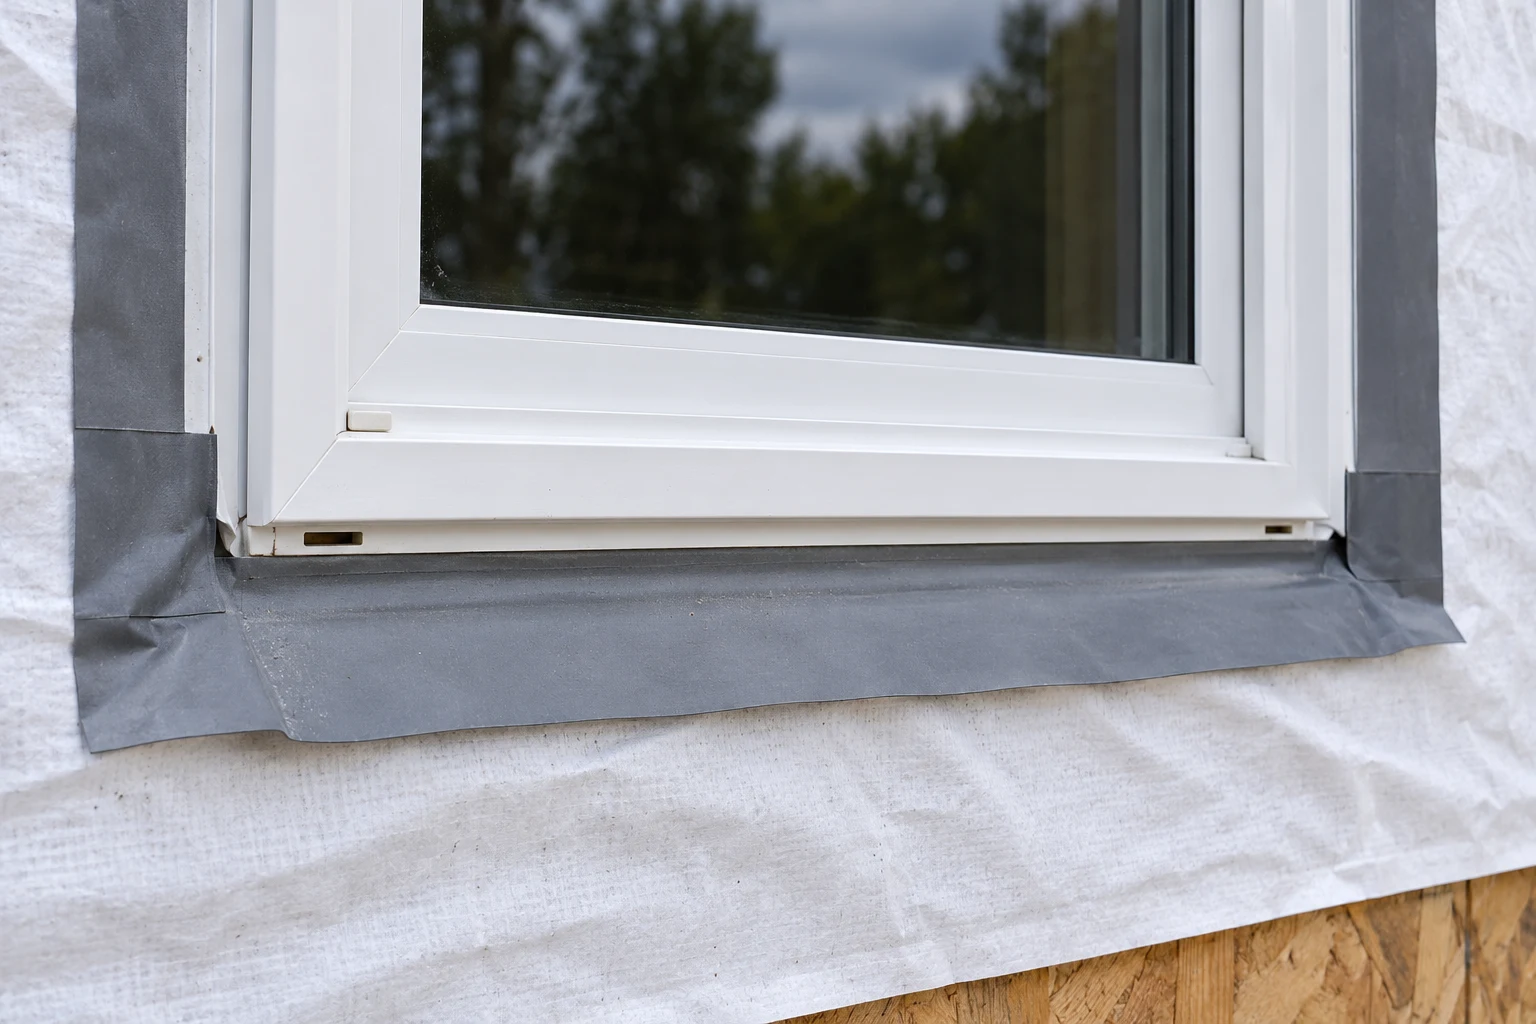
Review the exterior bottom edge, the window weeps, and the interior perimeter as separate inspection locations. Mark each location on the opening detail before checking the completed work.
Inspect before the siding goes on
Inspect window flashing before the siding is installed.
Walk the opening in the same order as the installation. Use the questions below for a pre-siding walkthrough, and record the matching detail beside each observation.
At the pan and lower wrap
To prevent a reverse lap at the bottom of the pan, install the drainage plane below the window before installing the pan flashing.
The pan surface should form a continuous waterproof barrier without water-retaining holes, tears, or wrinkles.
Ask: Does the front apron overlap the lower drainage plane? Are the corners tightly fitted? Has the selected pan joint been addressed? Check the sill from end to end before moving up the jambs.
At the jambs and head
Side flashing extends over the pan flashing.
Head flashing extends over the side flashing.
Fold the house wrap down over the head flashing.
Ask: Which head-flap instruction belongs to this wrap system? Where do the jamb strips terminate? Where do the ends of the head flashing terminate? Compare those locations directly with the selected detail.
At the drainage outlet and interior perimeter
The exterior bottom edge of the drained opening must remain open for drainage.
The entire interior window perimeter should be air sealed with sealant or non-expanding foam.
Ask: Has the exterior outlet been left open? Have the window weeps been left open? Has the interior perimeter been checked all the way around? Finish the walkthrough at these distinct locations.
For another exterior junction, read deck ledger flashing and the water path. For the interior-side topic, continue to rim joist insulation and air sealing.
Common window flashing installation questions
Does the pan go in before the window?
Install the sill pan before setting the window.
Install the window plumb, level, and square to its manufacturer’s specifications.
What is the purpose of the sill pan?
A sill pan collects water leaking through or around the opening and directs it outside.
A back dam or positive slope directs pan water outside.
Should the bottom exterior edge be sealed shut?
The exterior bottom edge of the drained opening must remain open for drainage.
The entire interior window perimeter should be air sealed with sealant or non-expanding foam.
What should happen at a membrane corner?
The membrane should fit tightly into the sill-to-jamb corner rather than bridge it.
A membrane that bridges the corner can be torn by the window unit.
How far does the flashing extend in the illustrated detail?
PNNL’s illustrated jamb flashing extends 4 inches above the head flange.
PNNL’s illustrated jamb flashing finishes even with the bottom of the sill flashing.
PNNL’s illustrated head flashing extends 1 inch beyond the jamb flashing.
What needs attention when a pan has a joint or a formed back dam?
A pan made in two pieces needs its joint sealed.
Protect manufactured and sheet-metal pan back dams from bending or breaking during window installation.
Where can FlexWrap™ be stretched?
Do not stretch FlexWrap™ along sills or jambs.
FlexWrap™ is intended to be stretched only at corners or curved sections.
When should the flashing be inspected?
Inspect window flashing before the siding is installed.
Use the walkthrough above to review the sill, side laps, head lap, wrap flap, and drainage outlet in order. Keep the completed opening and its selected installation detail together during that review.
Sources
- DOE/PNNL — Windows and Doors are Fully Flashed
- Building Science Corporation — Pan Flashing for Exterior Wall Openings
- TYPAR — Weather Protection System Installation Guide, Typical Window Flashing
- DuPont — Single-Family WRB and Flashing After WRB Installation Guidelines
- DOE/PNNL — Look for Missing Window and Door Flashing
Before cladding starts, recheck fastener lines at the jamb so the WRB is not pinned flat against wet sheathing. Keep the drainage path continuous from the sill pan outlet to the WRB face so wind-driven rain cannot sit against the rough opening. Those two field checks usually catch leaks that only show after the first hard rain on a newly flashed window. For framing context around that opening, see the structural framing and foundations hub.
Related Engineering Guides
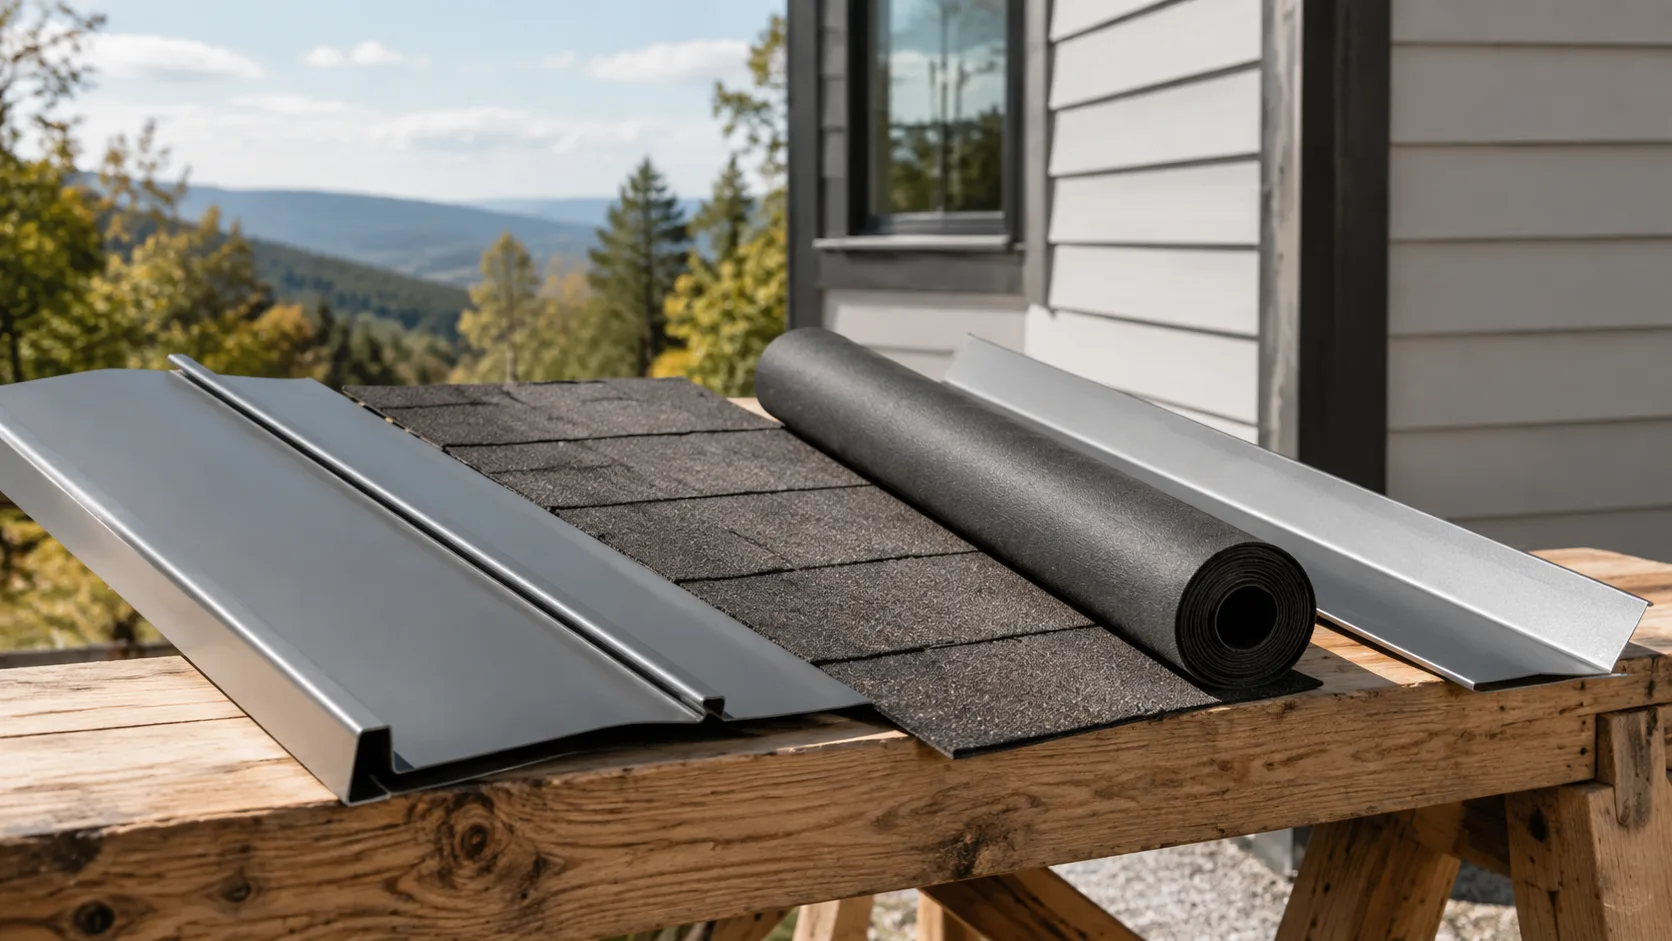
Exterior Siding and Roofing: Drainage, Cladding and Roof Details
Compare fiber-cement, metal and vinyl siding, roof coverings and the flashing connections that keep rain, air and moisture control continuous.
Read technical guide
Building Envelope Guide
Understand how roofs, walls, windows, foundations, air barriers, drainage planes, insulation, and HVAC work as one enclosure.
Read technical guide
Ice and Water Shield: IRC Eave Coverage, Valleys and Product Selection
Apply the 2024 IRC ice-barrier scope and eave geometry, coordinate valley and drip-edge laps, and compare GRACE HT product conditions for the roof assembly.
Read technical guide